
 Wer kennt sie nicht, die bunten, wahrscheinlich ungenießbarsten Kuchen der Welt? In den USA sind schließlich die Kuchen nicht unbedingt lecker, aber dafür bunt.
Ich wollte schon immer mal so einen Kuchen "backen" und dabei so richtig mit der Farbe matschen. Tutorials von bunten Kuchen gibt's zwar viele, jetzt aber sogar eines mit Bild für Bild-Beschreibungen. Zum Nachmachen, freuen, backen und essen.
Ein bunter Kuchen - nicht nur für den Kindergeburtstag
Auch hier in Köln gibt's so manche Backstube, die nicht mit Lebensmittelfarbe geizt. Wer genug Geld in der Tasche hat, kann seine Lieben nämlich mit bunten Köstlichkeiten von Madame Miammiam oder Törtchen Törtchen überraschen. Letztere kann ich sogar persönlich empfehlen. Wenn's hübsch aussehen soll, schmeckts zwar nicht - aber das ist ja eigentlich auch egal ;)Freut euch auf jede Menge Zucker, Sahne und Fett - bunten Kuchen backen
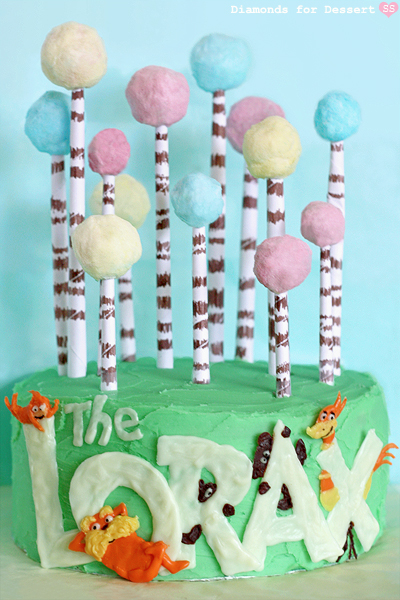
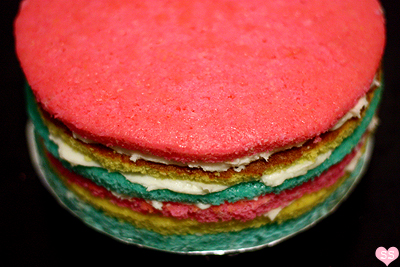
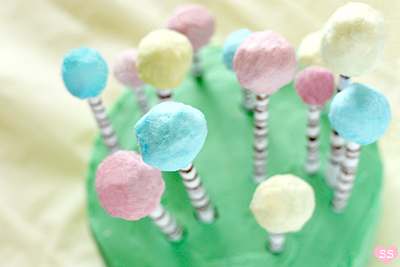
The Lorax Cake - Rezept:(Achtung - Englisch)I love the film's soft and colorful animation. The truffula trees look nice and fluffy, like cotton candy, which is what inspired me to make this cake. I thought a multicolored layer cake decorated with cotton candy truffula trees would be cute, with the color of the cake layers matching the colors of the cotton candy. It's a basic white cake tinted pink, blue, and yellow (inspired by Whisk Kid's Rainbow Cake). To finish, I altered one of the posters for The Lorax movie to feature not only the Lorax, but also some Swomee-Swans, Bar-ba-loots, and Humming-fish to make a colorful decoration for the side of the cake.

The Lorax Cake
Classic White Cake
adapted from Baking Bites
1 cup milk, room temperature
6 egg whites
1 tsp almond extract
1 tsp vanilla extract
3/4 cup (1 1/2 sticks) butter, room temperature
2 1/4 cups flour
1 3/4 cups sugar
4 tsp baking powder
1 tsp salt
pink, blue, yellow gel food coloring
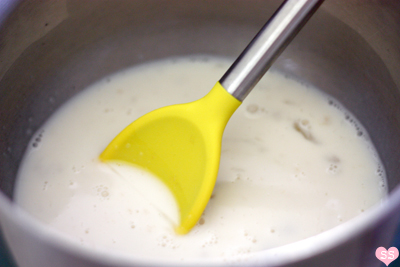
Preheat oven to 350°F. Spray three 8-inch diameter round cake pans with nonstick spray and line the bottoms with parchment paper. Set aside for the moment. Mix the milk, egg whites, almond extract, and vanilla extract in a small bowl.
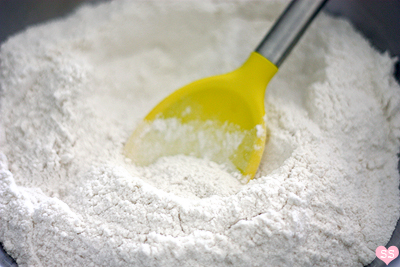
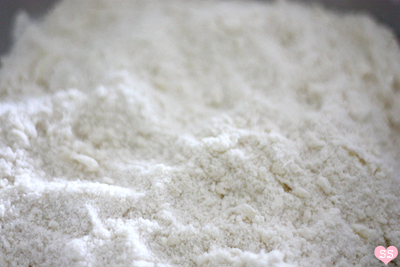
In a large bowl, combine the flour, sugar, baking powder, and salt. Rub/cut in the butter until the mixture looks like wet sand. Add 1/2 the milk mixture and stir. Then add the second half of the milk mixture and stir.

Divide the cake batter into 3 bowls (about 1 1/2 cups batter per bowl). Add 2 drops pink food coloring to one bowl, add 2 drops yellow food coloring to another bowl, and add 2 drops blue food coloring to the last bowl.

Pour the three cake batters into the three previously prepared cake pans. Place the pans in the oven and bake for 20 minutes, or until a toothpick comes out clean. Let cakes cool in the pans about 10 minutes, then flip the cakes onto cooling racks and let totally cool to room temperature.
Easy Vanilla Frosting
adapted from The America's Test Kitchen Family Baking Book
1 1/2 cup (3 sticks) butter, room temperature
3-4 cups powdered sugar
3 tbsp milk
2 tsp vanilla extract
1 tsp almond extract
green food coloring

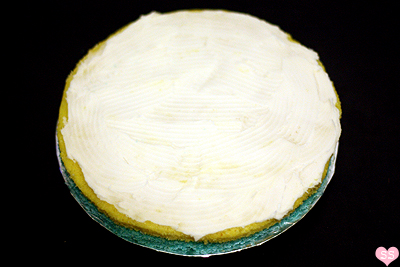
Cream the butter. Mix in 3 cups of powdered sugar. Add the milk, vanilla extract, and almond extract. Then if necessary, mix in more powdered sugar, adding it 1/4 cup at a time until you reach desired consistency. Now frost your cake as indicated in instructions below.

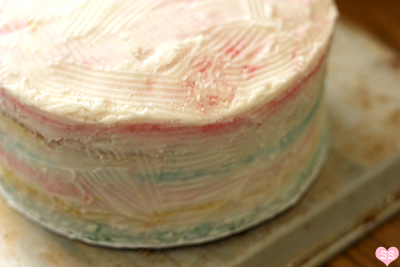
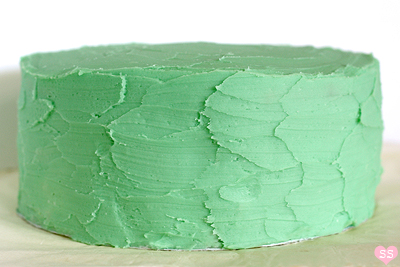
After the cake layers are stacked and the crumb coat is done, tint the remaining frosting with green food coloring and use that for the final layer of frosting.
Frosting the Cake
pink, blue, yellow cake layers
white and green vanilla frosting
cake board
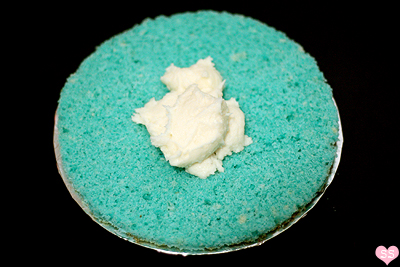
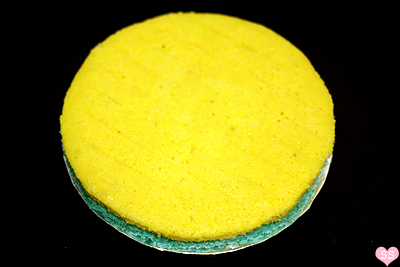
Slice each cake layer in half lengthwise so you end up with two thin pink layers, two thin blue layers, and two thin yellow layers.


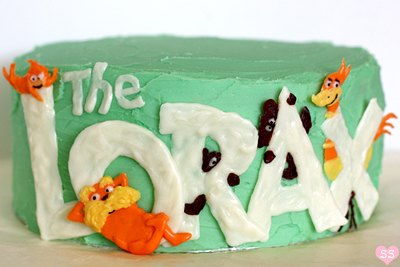
The Lorax Decoration (optional)
white, yellow, orange candy melts
semisweet chocolate
black food coloring pen


"L"

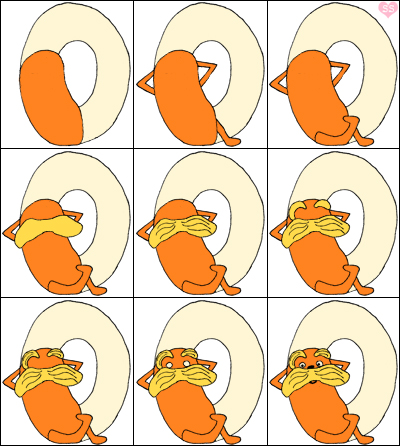
"O"
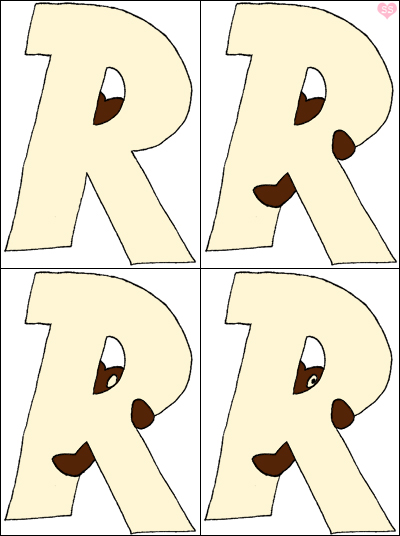
"R"
"A"

"X"
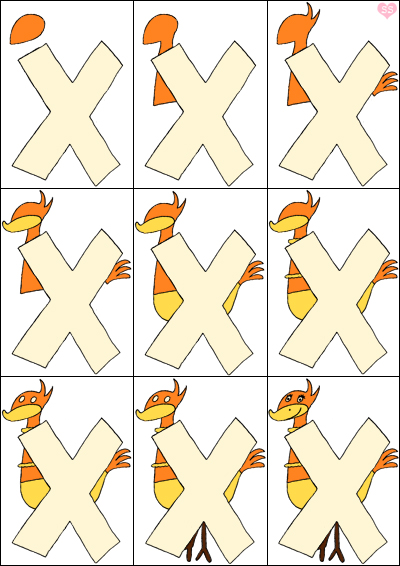

Use melted white candy melts to dot on two eyeballs. Melt semisweet chocolate and use it to draw on two legs (don't make them too thin or they will break when you try to remove the "X" later). Finally, use the food coloring marker and draw: pupils, eyelids, eyelashes, nostril, and mouth.
Cotton Candy Truffula Trees
pink, blue, yellow cotton candy
3 sheets white printer paper
brown marker
scotch tape
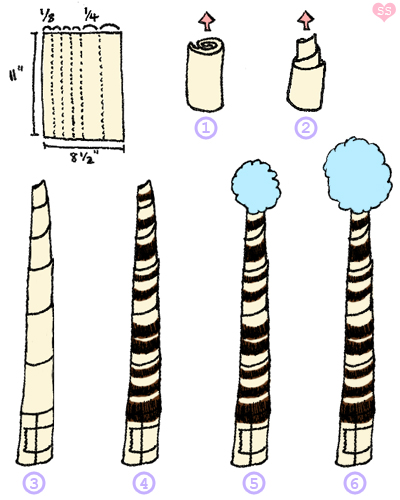

Take one paper strip and curl it up to form a tight spiral. Pull the paper edge that's in the center of spiral upwards. Keep pulling so you form a tube. Once the tube is tight, stop pulling and tape down the paper edge at the bottom of the tube to keep it from unraveling. Use the brown marker to draw random rings around the tube. Repeat with all the paper strips to form all the tree trunks. Now take a bit of cotton candy and wrap it around the top of a paper tube. Wrap more cotton candy around until satisfied with the size.
Note: I bought my cotton candy at Party City, but I've seen cotton candy being sold at stores like CVS and Walmart as well.


